
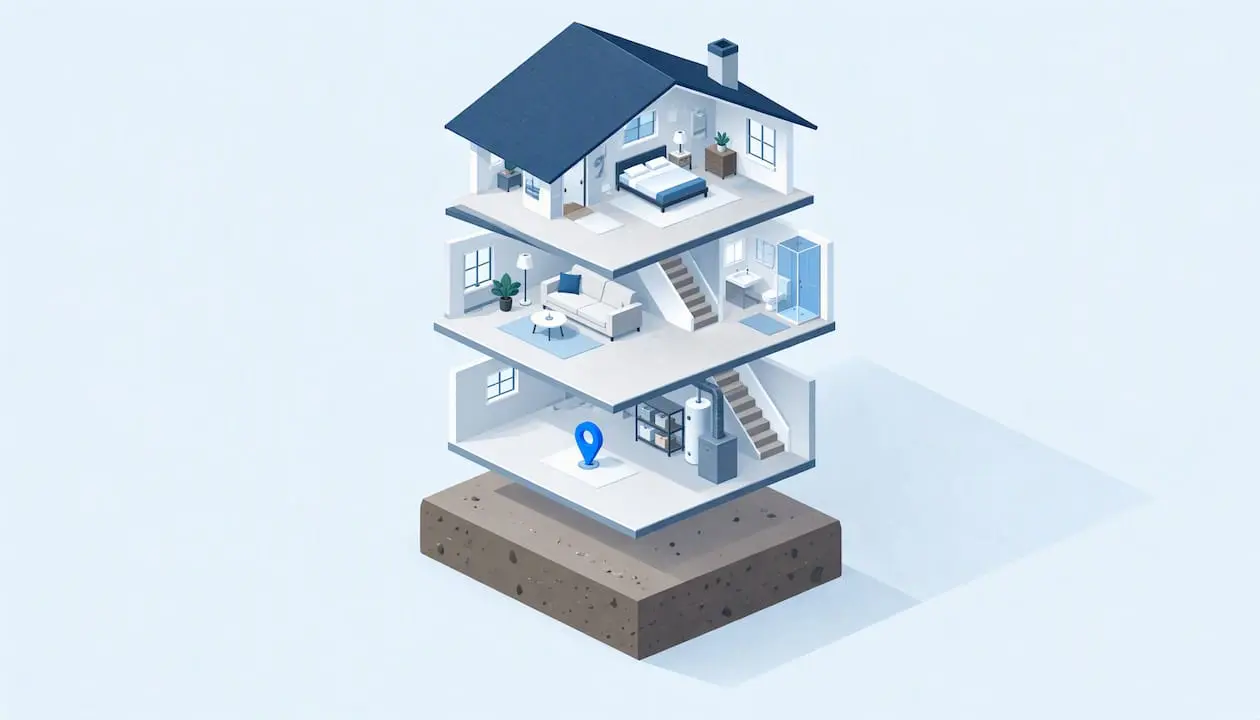
Place your radon test in the lowest level of the home that you live in or could live in, in a regularly used room, at least 20 inches off the floor, at least 3 feet from exterior doors and windows, and at least 1 foot from exterior walls. Keep it out of closets, cabinets, crawl spaces, sumps, and the damp air of a bathroom or laundry room. Those details come from the ANSI/AARST MAH protocol, and they matter because a test in the wrong spot can read too low and hide a problem, or read too high and cost you money you did not need to spend.
This guide walks through each placement decision in the order you will make it: which floor, which room, what height, what distance from walls and openings, what to avoid, and how to prepare the house. It also explains how radon gets into a home, because knowing the entry points makes the placement rules easier to remember.
TL;DR
- Test in the lowest level that is or could be occupied, such as a basement with a family room, a playroom, or a bedroom, and put the device in the breathing zone of a room you actually use.
- Keep the device at least 20 inches above the floor, at least 1 foot below the ceiling, at least 3 feet from exterior doors and windows, and at least 1 foot from exterior walls.
- Stay away from closets, cabinets, crawl spaces, sumps, heat sources, direct sun, HVAC drafts, and humid kitchens, bathrooms, and laundry rooms.
- Close windows and outside doors at least 12 hours before a short-term test starts, and keep them shut as much as possible during it.
- A result at or above 4 pCi/L is the EPA's action level, so confirm it and talk to a mitigation professional.
Table of Contents
- Why placement changes the result
- How radon enters a home
- Step 1: Choose the right level
- Step 2: Get the height and distances right
- Step 3: Know where not to put it
- Short-term kits and continuous monitors: what differs
- Step 4: Prepare the house
- What the result means
- Our perspective
- When to hand placement to a professional
- Common placement mistakes at a glance
- FAQ
- Sources
Why placement changes the result
Radon is a gas that moves up out of the soil. Its concentration inside a house is not the same everywhere. It tends to be highest near the foundation, where the gas arrives, and lower on upper floors as it mixes with room air. Fresh air leaking in around a window or door dilutes it further. A test device measures only the air around it, so where you set it decides what it reports.
The goal of placement is to measure the air a person actually breathes, in the part of the house closest to the ground that someone uses. That is why the standard is written around occupied space and breathing height, not around the spot where radon is most concentrated. A test in a sump pit would show a huge number that says nothing about your family's exposure.
How radon enters a home
The EPA's home buyer's and seller's guide explains that radon typically moves up through the ground and enters homes through cracks and other holes in the foundation. It can also come in through well water, though the same guide's perspective is that inhaling radon that has built up from soil gas is the larger risk and the one to test and fix first.
Why does the gas go inside at all? Indoor air pressure is normally lower than the pressure in the soil around the foundation, which creates a slight vacuum that pulls soil gas into the house, as the CDC's toxicology guidance describes. The house works a bit like a chimney, and the foundation is where the draw is strongest.
Common entry points to know about
Because the pull is strongest at the foundation, these are the places radon commonly gets in:
- Cracks in a concrete slab or in basement floors
- Gaps where the slab meets the foundation wall (the cove joint)
- Openings around pipes, utility lines, and sump pits
- Floor drains that are not trapped
- Hollow-block walls and mortar joints
- Dirt or fieldstone areas in older foundations
The EPA guide also says testing is recommended in all homes, regardless of age, seal, or whether there is a basement, since radon can infiltrate any home in contact with the ground. A new, tight house is not exempt, and neither is a house on a slab. If you want more on that, see our piece on why even a brand-new house needs a test, or on fieldstone and dirt-floor foundations in older homes.
Notice what this means for placement. Entry points are the reason you test on the lowest level, but you do not put the test at an entry point. You put it a short distance from them, in air that people breathe.
Step 1: Choose the right level
The ANSI/AARST protocol says to test in the lowest level that is or could be occupied. That includes a finished basement, but also an unfinished one that you could reasonably turn into a playroom, bedroom, or office. If the home has a basement you use for storage only, with no plans to live there, the lowest level to test is the first one that people occupy. If you have a basement you might finish someday, the safer approach is to test it as is, since the result tells you what you would be living with.
Slab-on-grade homes have no basement, so the ground floor is the lowest level. Homes over a crawl space are tested on the lowest living floor, not inside the crawl space itself.
A federal protocol document from the EPA archive adds a useful caution: measurements made above a basement can fail to characterize a radon hazard if the heating system is not running during the test. Heating draws air up through the house and raises the pull on the soil. Testing upstairs when the furnace is off can make the home look safer than it is. In practice, test the lowest level first, and if you also want to know about upper floors, test them in addition, not instead.
Which room on that level?
Pick a room where people spend real time. The ANSI/AARST standard puts the device in the breathing zone of a frequently used room. The AARST-based protocol guidance likewise advises choosing locations where people are more likely to be, such as a finished or occupied room. Good choices are a family room, den, playroom, home office, or bedroom.
When the lowest level is a large open basement, put the test in the area you use or would use, not in the mechanical corner by the furnace and water heater. If the level has several separate rooms and you are testing a home for a sale, a professional may place more than one device so the result represents the whole level.
A real estate transaction raises the stakes. Buyers and sellers should read our guide on radon contingency clauses and the 4 pCi/L line before a test is ordered, because where the device sat can become a question if the result is disputed. A neighboring-state agent's write-up on testing the lowest livable level in winter makes the same point about choosing locations where residents spend time.
Step 2: Get the height and distances right
This is where most do-it-yourself placements go wrong. The ANSI/AARST MAH protocol sets these minimums:
| Measurement | Requirement |
|---|---|
| Height above the floor | At least 20 inches (50 cm) |
| Distance below the ceiling | At least 1 foot |
| Distance from exterior doors and windows | At least 3 feet |
| Distance from exterior walls | At least 1 foot |
| Distance from other detectors or objects above or beside it | At least 4 inches (10 cm) |
Some popular guides quote slightly different figures, for example two feet below the ceiling. The numbers above are the ones in the standard itself. If you stay within them, you are fine under either version.
Other guidance describes the breathing zone as roughly 2 to 6 feet off the floor, which is consistent with the standard: the 20-inch floor is a minimum, not a target. A tabletop, shelf, or hanging position in the middle of that range works well. A table is better than the floor because dust, pets, and cleaning can disturb a device on the ground, and floor-level air near a slab can read differently from air at breathing height.
A simple way to remember it
Think of a bubble around the device. Nothing within 4 inches of it, no door or window within 3 feet, no exterior wall within a foot, and enough clearance above and below. If a spot fits the bubble, it is probably a good spot.

Step 3: Know where not to put it
The protocol is just as specific about what to avoid. Do not place a test:
- In closets or cabinets, where air barely moves
- In crawl spaces, sumps, or nooks within the foundation
- Near heat sources such as appliances or fireplaces
- In direct sunlight
- In the path of drafts from HVAC vents
- In enclosed, high-humidity rooms such as kitchens, bathrooms, and laundry rooms, unless the device is virtually unaffected by humidity
The reasons are practical. Closets and cabinets trap air and can inflate a reading. Heat, sun, and moving air can disturb how a device collects or senses radon. Humidity can interfere with many devices and with activated charcoal kits in particular, which is why the standard treats damp rooms as off limits. Health Canada's guide to radon measurements in homes adds that some devices can be affected when placed directly next to or on electrically powered devices or network appliances, so a router, TV, or computer is a poor shelf.
Two more habits help. Do not move the device once it starts, and keep children and pets from handling it. A test that was shifted halfway through is a test you may have to repeat.
Short-term kits and continuous monitors: what differs
The placement rules are the same for both kinds of device: lowest occupied level, breathing zone, clear of walls, windows, drafts, and humidity. The differences are in handling.
Short-term kits (activated charcoal or similar) are exposed for a set period, then sealed and sent to a lab. Follow the kit's directions on opening and closing, write down the start and stop times, and mail it promptly. You get a single average figure.
Continuous radon monitors measure and log readings over time. They need a stable power source or batteries, and they should sit where the display or app can sync without being moved. Because they record hour-by-hour data, they can show the swings caused by weather and ventilation, and a professional can review whether the house was kept closed. Pay particular attention to the manufacturer's instructions for humidity and warm-up time.
If you own a monitor for long-term watching, one device on the lowest occupied level answers the main question. Some homeowners place a second one on another floor to compare, which is reasonable as extra information once the first test is done correctly.
How long to run the test is its own decision. We cover that in why 48 hours may not be enough.
Step 4: Prepare the house
Placement works only if the house is in normal, closed conditions. The Massachusetts state radon testing guidance, a state department of public health document, says that for 2- or 3-day short-term tests you should close windows and outside doors at least 12 hours before the test begins and keep outside doors closed as much as possible throughout. Normal entering and leaving is fine.
A practical checklist:
- Close windows and outside doors 12 hours ahead.
- Do not run whole-house fans or open windows during the test. Ordinary heating or air conditioning can run normally.
- Place the device following the table above and note the room, height, and start time.
- Leave it undisturbed for the full test period.
- Seal and mail a kit right away, or download the data from a monitor.
Timing and season
Radon levels are typically higher in winter, so some states advise testing in the cold months. Massachusetts, for example, advises testing between Nov. 1 and Mar. 31. That does not mean a test in another season is worthless. It means a result taken in mild weather with windows open part of the day may be lower than your winter average. If your house is closed up and the furnace is running, a test any time of year gives you useful information. If you test in spring or summer and land near the action level, repeat it in cold weather.
What the result means
Radon is measured in picocuries per liter (pCi/L). The EPA, in its overview of radon in homes, schools, and buildings, recommends action if levels reach 4 pCi/L or higher. Its page on testing your home for radon is not the source of that figure, but the same agency's standards page notes that ANSI/AARST MAH-2023 specifies the procedures and minimum requirements for measuring radon in single-family residences, with compliance effective December 1, 2023. That matters if you are hiring a tester: a professional should be working to that standard.
If your result is at or above 4 pCi/L, do not panic and do not ignore it. Read what to do when your test is at 4 pCi/L first. A confirming test, placed the same way, is a sensible next step before you commission a system. Radon has no smell, color, or taste, so you cannot judge it without a test; we explain that in why radon has no smell.
Our perspective
We do nothing but radon, and most of the confusing results we see trace back to placement or to a house that was not closed up properly. A kit set on a basement floor beside an open window, a monitor tucked into a closet, a charcoal canister in a steamy laundry room: each of these looks like a test and produces a number, yet the number can mislead in either direction.
Our approach is site-specific. Cincinnati homes vary widely, from older houses with fieldstone and hollow-block foundations to newer slabs and finished walkout basements, and the right test location depends on how the lower level is actually used. We would rather spend ten minutes walking a house and choosing the spot than hand over a kit with a pamphlet. When a test points to mitigation, we design the system around the foundation in front of us, give a fixed written quote with no added costs after quoting, and finish with post-installation verification testing, so you see that the system worked rather than assuming it did. Our installations are ANSI/AARST certified.
If you are testing to buy or sell, the placement matters even more, because the number will be read by people who were not there. Documentation that records where and how the test ran protects everyone in the deal.
— Yoshua
When to hand placement to a professional
Do-it-yourself placement is realistic for a single-family home with one clear lowest living area. A professional is the better call when:
- You are buying or selling and the result will be used in negotiation
- The lower level is large, divided into several rooms, or partly finished
- The house has an unusual foundation, such as fieldstone, a dirt floor, or a mix of slab and crawl space
- You are managing a multi-family or commercial building; see radon in apartments for multifamily owners
- A previous result was close to 4 pCi/L and you want a repeatable setup
Our radon testing service in Cincinnati covers placement, closed-house conditions, and a clear written result. If the number comes back high, the same team can handle radon mitigation, and you can see how the work is scoped on our mitigation cost page. For the owner of an existing system that has gone quiet, our repair and fan replacement service is the place to start.
Common placement mistakes at a glance
| Mistake | Why it hurts the result | Fix |
|---|---|---|
| Device on the floor | Below the 20-inch minimum, easy to disturb | Move to a table or shelf |
| Testing only upstairs | May miss the lowest occupied level | Test the lowest livable level |
| Next to an open window or door | Outdoor air dilutes the reading | Keep at least 3 feet away and keep windows shut |
| In a closet or cabinet | Stagnant air, not breathing air | Use an open, regularly used room |
| In a bathroom or laundry room | High humidity can disturb the device | Choose a drier living space |
| Near a vent, heater, or sunny window | Drafts and heat affect the measurement | Pick a stable spot out of the airflow |
| Moving the device mid-test | Breaks the exposure period | Leave it alone until done |
FAQ
Should I place a radon test in the basement or on the ground floor?
Test the lowest level of the home that is or could be occupied. If your basement is a finished or usable living space, that is where the test goes. If the basement is purely storage and you would never live in it, the ground floor is the lowest level to test.
How high off the floor should a radon detector be?
At least 20 inches above the floor, and at least 1 foot below the ceiling, according to the ANSI/AARST MAH protocol. A table or shelf in the breathing zone of the room works well. Keep at least 4 inches of space around the device so air can reach it.
Where should I not place a radon test?
Avoid closets, cabinets, crawl spaces, sumps, and nooks in the foundation, as well as places near heat sources, direct sun, or HVAC drafts. Skip enclosed, humid rooms such as bathrooms, kitchens, and laundry rooms. Also keep it at least 3 feet from exterior doors and windows.
What time of year is best to test for radon?
Winter is typically when radon levels run higher, and some states, such as Massachusetts, advise testing from Nov. 1 to Mar. 31. You can test in any season if the house is kept closed, but a result near 4 pCi/L in mild weather is worth repeating in cold weather.
Do I need more than one radon test in a house?
One correctly placed device on the lowest occupied level answers the main question. Larger homes, split-level layouts, and real estate transactions may call for more than one device, and testing additional floors can add useful information once the first test is done properly.
Sources
- ANSI/AARST MAH 2023 protocol for measuring radon (public review, 2024)
- EPA: Home Buyer's and Seller's Guide to Radon
- CDC/ATSDR: Radon Toxicity, Annex I: Methods of Detection
- Protocols for radon and radon decay product measurements in homes (EPA archive)
- Health Canada: Guide for radon measurements in homes
- Massachusetts: Testing for Radon in Your Home
- EPA: Radon in Homes, Schools and Buildings
- EPA: Radon Standards of Practice